Your first Riverpod app
In this tutorial, we will build a random joke generator app using Riverpod:
Key points
- Learn to install Riverpod
- Create your first provider to make a network request
- Use Consumer to display the data
- Handle AsyncValue to display loading and error states
Setting up the project
Creating a Flutter project
To start, let's create a new Flutter project:
flutter create first_app
Then, open the project in your favorite editor.
Creating a mocked UI
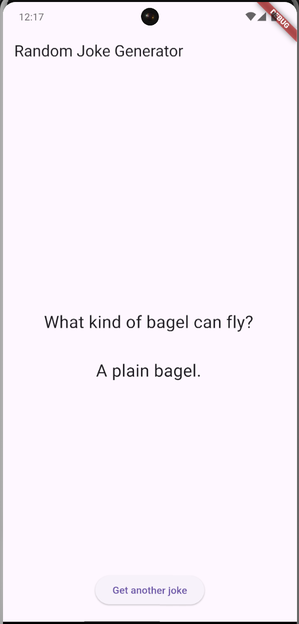
Before we start to write any form of logic, let's create the UI of our app. Instead of using a real API, we will start with static data.
Let's create a new file called home.dart in the lib directory of our project.
In it, you can paste the following code:
import 'package:flutter/material.dart';
class HomeView extends StatelessWidget {
const HomeView({super.key});
Widget build(BuildContext context) {
return Scaffold(
appBar: AppBar(title: const Text('Random Joke Generator')),
body: SizedBox.expand(
child: Stack(
alignment: Alignment.center,
children: [
const SelectableText(
'What kind of bagel can fly?\n\n'
'A plain bagel.',
textAlign: TextAlign.center,
style: TextStyle(fontSize: 24),
),
Positioned(
bottom: 20,
child: ElevatedButton(
onPressed: () {},
child: const Text('Get another joke'),
),
),
],
),
),
);
}
}
Then, we can update our main.dart file to use this new HomeView widget:
import 'package:flutter/material.dart';
import 'home.dart';
void main() {
runApp(const MyApp());
}
class MyApp extends StatelessWidget {
const MyApp({super.key});
Widget build(BuildContext context) {
return const MaterialApp(home: HomeView());
}
}
If you run the app now, you should see the following:
Adding Riverpod to the project
After creating the project, we need to add Riverpod as a dependency.
We will be using Riverpod and Flutter, so we will install the flutter_riverpod package.
Similarly, we will be performing network requests using the Dio package, so we will install that as well.
You can do so by typing the following command in your terminal:
flutter pub add flutter_riverpod dio
This will add the latest version of Riverpod to your project, along with Dio.
(Optional) Adding riverpod_lint
To help you write better Riverpod code, you can install the riverpod_lint package.
This package provides a set of refactors to more easily write Riverpod code, as well as a set of lints to help you avoid common mistakes.
Riverpod_lint is implemented using analysis_server_plugin. As such, it is installed through analysis_options.yaml
Long story short, create an analysis_options.yaml next to your pubspec.yaml and add:
plugins:
  riverpod_lint: <latest version from https://pub.dev/packages/riverpod_lint>
Adding ProviderScope in our main function
For Riverpod to work, we need to update our main function to include a ProviderScope.
You can learn about those objects in the ProviderContainers/ProviderScopes section.
Here's the updated main function:
void main() {
  runApp(
    // Add ProviderScope above your app
    const ProviderScope(
      child: MyApp(),
    ),
  );
}
Creating a model class
In this tutorial, we will fetch data from a Random Joke generator API.
This API returns a JSON object that looks like this:
{
  "type": "general",
  "setup": "Why did the scarecrow win an award?",
  "punchline": "Because he was outstanding in his field.",
  "id": 333
}
To represent this data in our app, we will create a model class called Joke.
For this, let's create a new file called joke.dart in the lib directory of our project.
Here's how the Joke class looks like:
class Joke {
  Joke({
    required this.type,
    required this.setup,
    required this.punchline,
    required this.id,
  });

  factory Joke.fromJson(Map<String, Object?> json) {
    return Joke(
      type: json['type']! as String,
      setup: json['setup']! as String,
      punchline: json['punchline']! as String,
      id: json['id']! as int,
    );
  }

  final String type;
  final String setup;
  final String punchline;
  final int id;
}
Notice the fromJson factory constructor.
Since our API returns a JSON object, we need a way to convert JSON data into our Joke class.
This constructor takes a Map<String, Object?> and returns a Joke instance.
Writing a function that calls the API.
Now that we have our model class, we can write a function that fetches the data from the API. We will use the Dio package here, because it naturally throws if a request fails, which is convenient for our use case. But you can use any HTTP client you prefer.
We can place that logic in the joke.dart file we just created,
as this logic is closely related to the Joke class.
final dio = Dio();

Future<Joke> fetchRandomJoke() async {
  // Fetching a random joke from a public API
  final response = await dio.get<Map<String, Object?>>(
    'https://official-joke-api.appspot.com/random_joke',
  );

  return Joke.fromJson(response.data!);
}
Notice how we did not catch any error from the API call.
This is on purpose. Riverpod will handle errors for us, so we don't need to do it manually.
Creating a provider that fetches the data
Now that we have a function to query the API, we can create a "provider" responsible for
caching the result of that API.
See Providers for more information about them.
Since our fetchRandomJoke function returns a Future<Joke>, we will use FutureProvider.
We can place the provider in the same joke.dart file, as it is also related to the Joke class.
By doing this, the execution of fetchRandomJoke will be cached, and regardless of how
many times we access to the value, the network request will only be performed once.
final randomJokeProvider = FutureProvider<Joke>((ref) async {
  // Using the fetchRandomJoke function to get a random joke
  return fetchRandomJoke();
});
The separation between our fetchRandomJoke function and the randomJokeProvider is not mandatory.
You can directly write the content of fetchRandomJoke inside the provider if you prefer:
final randomJokeProvider = FutureProvider<Joke>((ref) async {
  final response = await dio.get<Map<String, Object?>>(
    'https://official-joke-api.appspot.com/random_joke',
  );

  return Joke.fromJson(response.data!);
});
Displaying the data in the UI
Wrapping our UI in a Consumer
Now that we have a provider, it is time to update our HomeView widget to dynamically load data.
To do so, we will need another feature of Riverpod: the Consumer widget.
This widget allows us to read the value of a provider and rebuild the UI when the value changes.
It is used in a manner that is reminiscent of widgets such like StreamBuilder.
Specifically, we will want to encapsulate the Stack in a Consumer widget.
If you have installed riverpod_lint in the earlier step, you can use one of the built-in refactors:
The updated home.dart code should look like this:
import 'package:flutter/material.dart';
import 'package:flutter_riverpod/flutter_riverpod.dart';
class HomeView extends StatelessWidget {
const HomeView({super.key});
Widget build(BuildContext context) {
return Scaffold(
appBar: AppBar(title: const Text('Random Joke Generator')),
body: SizedBox.expand(
child: Consumer(
builder: (context, ref, child) {
return Stack(
alignment: Alignment.center,
children: [
const SelectableText(
'What kind of bagel can fly?\n\n'
'A plain bagel.',
textAlign: TextAlign.center,
style: TextStyle(fontSize: 24),
),
Positioned(
bottom: 20,
child: ElevatedButton(
onPressed: () {},
child: const Text('Get another joke'),
),
),
],
);
},
),
),
);
}
}
Obtaining our joke and listening to its changes
Now that we have a Consumer, we can use its ref parameter to read our provider.
Using this object, we can call ref.watch(randomJokeProvider) to obtain the current value of the provider.
But there are other ways to interact with providers! See Refs for more information.
Our updated Consumer should look like this:
Consumer(
  builder: (context, ref, child) {
    final randomJoke = ref.watch(randomJokeProvider);
    // ...
  },
)
With this line, Riverpod will automatically fetch the joke from our API and cache the result.
We can now use the randomJoke variable to display the joke in our UI.
Handling loading and error states
The randomJoke variable we created earlier is not of type Joke, but rather of type AsyncValue<Joke>.
AsyncValue is a Riverpod type that represents the state of an asynchronous operation, such as a network request.
It includes information about loading, success, and error states. AsyncValue is in many ways similar to the AsyncSnapshot type used in StreamBuilder.
A convenient way to handle the different states is to use Dart's switch feature. It is similar to an
if/else if chain, but tailored for handling conditions on one specific object.
A common way to use it when combined with AsyncValue is as follows:
switch (asyncValue) {
  // If "value" is non-null, it means that we have some data.
  case AsyncValue(:final value?):
    return Text(value);
  // If "error" is non-null, it means that the operation failed.
  case AsyncValue(error: != null):
    return Text('Error: ${asyncValue.error}');
  // If we're neither in data state nor in error state, then we're in loading state.
  case AsyncValue():
    return const CircularProgressIndicator();
}
The order of operation matters!
If using the syntax used above, it is important to check for values
before checking for errors and to handle the loading state last.
If using a different order, you may see incorrect behavior, such as showing a progress indicator when the request has already completed.
We can now update our Stack to display the joke, loading indicator, or error message based on the state of randomJoke:
return Stack(
  alignment: Alignment.center,
  children: [
    switch (randomJoke) {
      // When the request completes successfully, we display the joke.
      AsyncValue(:final value?) => SelectableText(
        '${value.setup}\n\n${value.punchline}',
        textAlign: TextAlign.center,
        style: const TextStyle(fontSize: 24),
      ),
      // On error, we display a simple error message.
      AsyncValue(error: != null) => const Text('Error fetching joke'),
      // While the request is loading, we display a progress indicator.
      AsyncValue() => const CircularProgressIndicator(),
    },

    // <code for the button remains unchanged>
  ],
);
At this stage, our application is connected to internet and a random joke is displayed when the app is launched!
Connecting the "Get another joke" button
Currently, we display a random joke when the app is launched, but clicking on the button does nothing. Let's update the button to fetch a new joke when clicked.
We could use a pattern similar to ChangeNotifier and manually handle the state.
Riverpod supports such patterns, but it is not necessary here.
Instead, we can tell Riverpod to re-execute the logic of our provider when the button is clicked. This can be done by using Ref.invalidate like so:
ElevatedButton(
  onPressed: () => ref.invalidate(randomJokeProvider),
  child: const Text('Get another joke'),
),
That is all we need to do!
When the button is clicked, Riverpod will re-execute the logic of randomJokeProvider, which will
fetch a new joke from the API and update the UI accordingly.
Adding a LinearProgressIndicator when a new joke is being fetched
You may have noticed that when clicking on the "Get another joke" button, the app does not show any loading indicator.
This is because when we call Ref.invalidate, the existing cache is not destroyed. Instead, while the new joke is being fetched, we retain information about the previous joke. This allows us to display the previous joke while the new one is being fetched.
However, UIs may want to handle those cases and show both a loading indicator and the previous joke.
A LinearProgressIndicator is a common way to do so. To add this indicator, we can check
AsyncValue.isRefreshing. This flag is true when old data is available and a new request is being made.
Our updated Stack should look like this:
return Stack(
  alignment: Alignment.center,
  children: [
    // During the second request, we show a special loading indicator
    if (randomJoke.isRefreshing)
      const Positioned(
        top: 0,
        left: 0,
        right: 0,
        child: LinearProgressIndicator(),
      ),

    // Show the data and button like before
  ],
);
That's all!
We now have a fully functional random joke generator app that fetches jokes from an API and displays them in the UI.
And we have handled all edge-cases, such as loading and error states.
Notice how we never had to write a try/catch or write code such as isLoading = true/false.